How I set up this static site documentation
If you are someone who has never worked with the Terminal and are working on a Macbook, then this documentation is for you.
Useful Terminology
-
shell = Unix Command Line
-
RC = Run Command
-
LS = List all files
Useful Resources/References
-
Working with terminal: https://mac.install.guide/ruby/15.html
-
Installing Ruby: https://mac.install.guide/ruby/1.html
-
Installing home-brew: https://brew.sh
-
Installing error online thread that helped: https://stackoverflow.com/questions/34621049/how-to-clean-up-an-interrupted-homebrew-install
-
Setting up site GitHub: https://docs.github.com/en/pages/setting-up-a-github-pages-site-with-jekyll/creating-a-github-pages-site-with-jekyll
-
Download GitHub desktop: https://desktop.github.com
-
Theme Jekyll I went for: https://jamstackthemes.dev/ssg/jekyll/page/17/
1. Working with the Terminal on MacOs
-
You can find the Terminal in Utilities within your Finder, or your search engine.
-
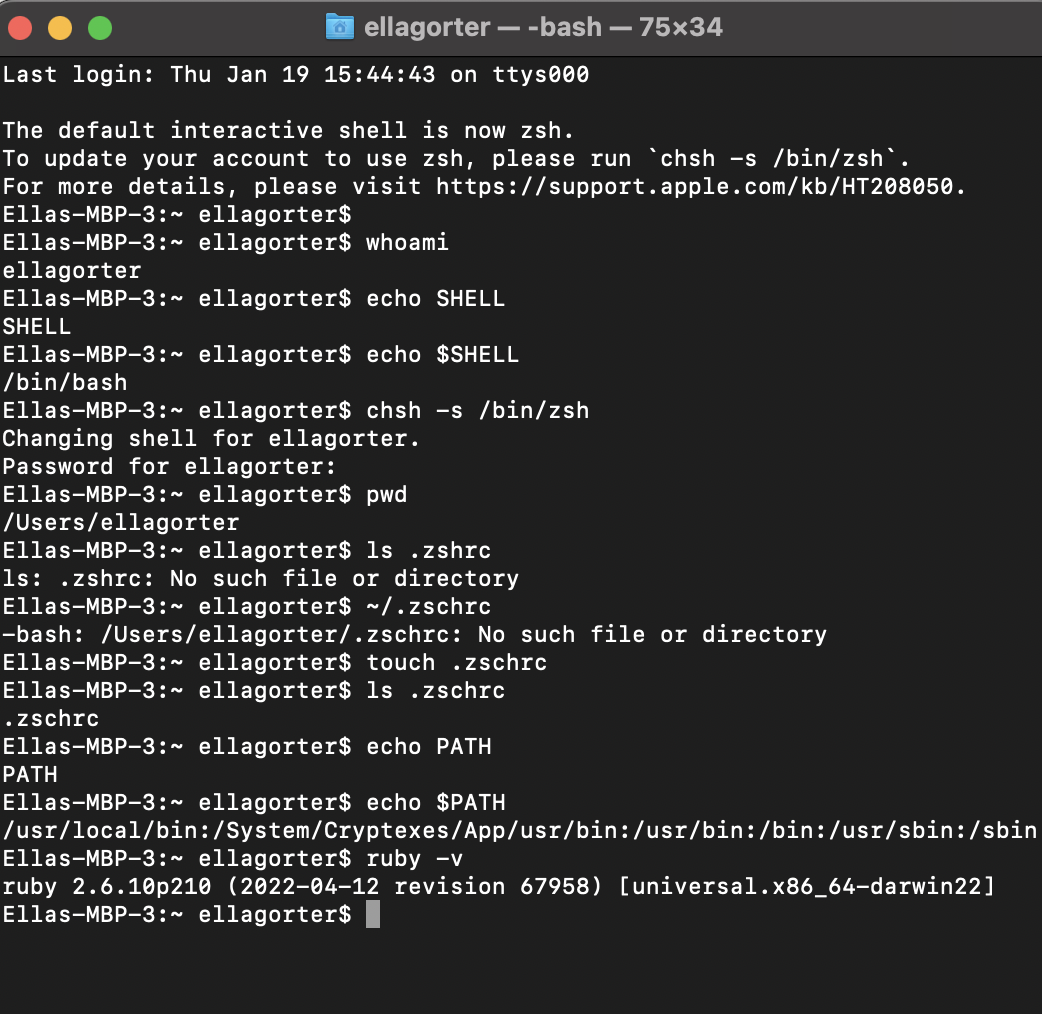
Ask your Operation System to verify your username:
$ whoami
The $ is an indication you should send in a shell command.
- First check which shell programme is running your Terminal by:
/bin/bash
(Below is a screenshot of what my terminal looked during this process)
2. Configuring Shell
-
You need a file in your USER HOME FOLDER that Zshell will read when the Terminal is launched. You might already have it (although it is not a default on MacOS)
-
Make one if needed
-
Check if it is now there
3. Path Setting
-
This sets the order in which your OS looks for software to execute
-
We set it in the zschrc file that we made. This file is hidden.
4. Xcode Command Line Tools
- We need Xcode Command Line Tools, for Unix Tools. We need Unix Tools to install Ruby and develop applications.
- It is easiest to Install Command line Tools as part of installing Homebrew [which is a Unix Utilities package manager]
- Check if you have previously installed Homebrew.
5. Installing Homebrew
- run the installation script through a single command line. It will then run and a motion of diagnostic and progress messages will be visible.
6. Configure Git
Git is a free and open-source distributed version of a control system designed to handle big and small projects
- Create a Github account
- Edit the configuration file by using the Username and Password for Github
- Check the Git configuration
- Copy the public key to OS clipboard
- add this link in the Github settings
- enter your password
7. Install ASDF VERSION MANAGER
This makes it easier to switch between Ruby versions (in case you update etc)
- In the Terminal, type :
brew install asdf
- add asdf to the shell environment = .zshrc file
8. View Existing Configuration File
- run command line
9. View Existing Ruby on your laptop
MacOs comes with a ‘system Ruby’ but it is recommended to not use it and instead install a different one.
- View this ‘system Ruby’ in the Terminal, so you know where it is. Leave it there and move to the next step.
10. Installing Ruby with asdf
-
go online and identify the latest version of Ruby available. For me this was Ruby 3.2.0
-
install the plugin
-
list all the Ruby versions available, and if the latest version is shown [ie for me 3.2.0] continue
-
Install the latest version, and this can take a while.
-
the installation should then be confirmed by the Operating System.
11. Install Ruby Gems
12. Install GCC
13. Install Jekyll and Bundler
If an error appears that you don’t have the latest Ruby or Rubygems, but this doesn’t allign with what you installed, your system might be chosing the wrong version of Ruby on your laptop. What worked for me was to re-install chruby
14. Setting up Github pages
As an intern, I am using Github. If you are a student of Fabacademy, you will be using Gitlab; our own Git run on our servers instead of those from Microsoft.
-
create a new repository and give it a name
-
download Github Desktop. This will allow you to push code from Visual Studio Code to the domain run by Git
-
find a Jekyll theme online, which you can use as the skeleton of your static site
-
‘Fork’ this theme in your Github repository
-
connect this to your Visual Studio Code
-
connect this to your Github Desktop
-
check if you are able to push through any changes from Visual Studio Code to Github Desktop to your domain
Starting up Local Host
When you are working on your static site in Visual Studio Code for example and pushing it through Github Desktop and then Git, you want a solid workflow. Using a Local Host will allow you to see the effect of changing your code within the browser, without publishing it onto youe domain right away. You then do not have to push through everytime you make adjustments, and keep better track of your overall development.
-
open up your terminal
-
identify where your repository folder is located on your laptop. I will show the route I take to mind. Change Directory to documents
cd documents
- list out all files within this folder called documents
ls
- you will then be given a list that looks like this:

- change directory to the folder of your repository
cd repository destination waag docu
Now if your folder name is very long like mine (which isnt recommended) you will recieve the following response:
cd: too many arguments
try to put the name into speech marks:
cd 'repository destination waag docu'
- list out all files within this folder
ls
- this then brings me to my repository folder, so I change directory to be inside the folder
cd ellasuza.github.io
- once in the repository folder, simply type:
jekyll s
- Whilst setting the local host up, you will see some command lines appear. In the second to last command line, you should see something like this:
Server address: http://127.0.0.1:4000
- Use this url within your browser, and you are ready to edit code. Once you save your code in Visual Studio Code, refresh your local host and it will visualize the changes.